
| Tools
you will need: * HomeCrafter * Paintshop Pro 7 or some other drawing tool that has layers, gradients and noise. |
Where
do I get it? Home Crafter is from the Sims Site à Get Cool Stuff à Make Cool Stuff, it's 2nd from the bottom. A Paintshop Pro demo version can be obtained from Jasc - but it's well worth buying if you can afford it. |
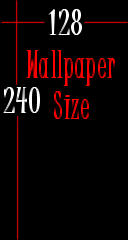 |
Wallpapers are 128 pixels across by 240
pixels down.
When you've finished creating a bitmap for the wallpaper, the colour depth must be 256 colours. As long as your bitmap has these dimensions and colour depth, basically it's ready to rock. Well, system requirements at least. Aesthetically, we'll work on that as we go. |
 |
1. Create a
New Image
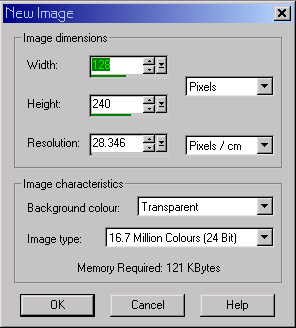
Open up your paint program, and open a New Image with the following details:
|
 |
2. Pick a
Colour
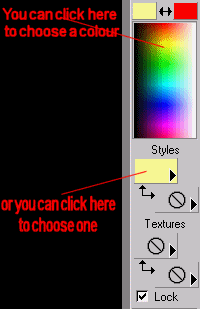
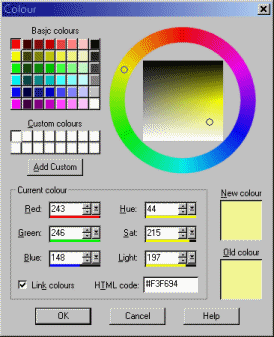
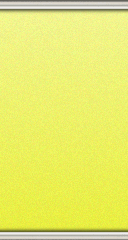
Now - Pick a Colour any Colour. I'm picking a lemony-yellow colour, cause well I like it. You need to choose the same colour for both the foreground and the background. That's the top and the bottom squares. (Note: It looks grainy here - because I've got the pictures as gifs to reduce the size - in the program it's smooth). |
 |
3. Create a
Contrast Colour
Click on the background colour (the 2nd box on the colour menu so that the colour window comes up. On the right hand side, you can see that the colour is defined in two ways Hue is the basic colour, For our purposes, we're going to be changing the Light setting so that the colour is darker. To do that - subtract at least 25 from the current value. So for me - that's 197 - 25 = 172. Don't worry about how it changes the RGB values. The colour needs to be just noticeably darker, so if you can't see a difference don't be afraid to experiment. Click OK to close the window. |
 |
4. Set up
the Gradient
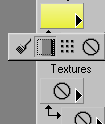
Now, Click on the black triangle on the side of the Foreground colour, which brings up a little menu of 4 choices. Choose the 2nd one - Gradient |
 |
Click
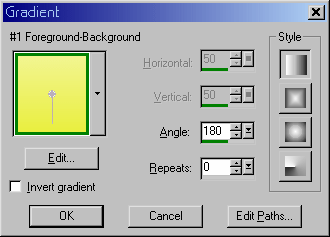
on the colour, to bring up the gradient menu.
We want to choose the #1 Foreground-Background gradient (click on the box to pull up the menu, if it's not already chosen.) We also want no repeats, and we want the dark colour on the bottom - so choose an angle of 180. Click OK to accept the change. You'll notice that the gradient now appears in the first colour box. |
 |
5. Fill the
wallpaper with Colour
Choose
your Fill Tool |
 |
6. Add Noise
for interest (optional)
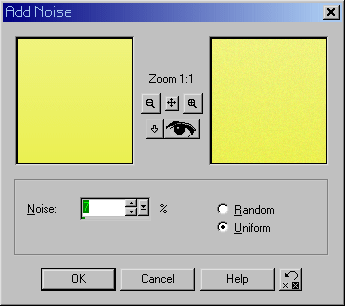
On the Menu bar, choose Effects -> Noise -> Add. Then make sure the radio button is on Uniform, and choose a noise percent that adds a pleasing amount of noise without being overwhelming. I find 7 is a good number, to add subtle noise. Click OK to save. You can leave the noise out - but you can end up getting lines of colour in the final wallpaper depending on how different are the colours you've chosen. |
 |
7. Add
Skirting Boards (optional)
Now - I like having skirting boards and ceiling boards on mine, though it's entirely up to you. Rather than go into how to make the boards - here's the one I use. Pop it into a folder somewhere where you can find it. Open it up in PSP, copy it, and "Paste as Layer" onto our wallpaper. Do that twice, and with the second one, invert it (Ctrl-I) so that it works for the top. Then finally move the boards into place - like so. |
 |
It's
basically done, so all we need to do now - is to reduce the colour depth
to 256 colours, and save it as a bitmap in the Walls folder.
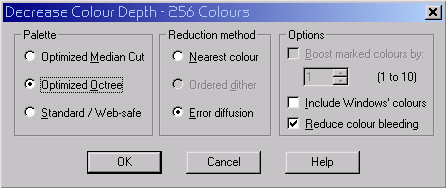
From the menu bar, choose Colour, Choose "Decrease Colour Depth". A window pops up. I use Optimized Octree, Error diffusion and Reduce colour bleeding selections. I have no idea what the different selections mean - but this is the one that I found gives me the closest to what I actually want. Feel free to experiment. Alternatively the keyboard shortcut is: Ctrl-Shift-3 to bring up the same window Remember Ctrl-Z (Undo) is your friend. |
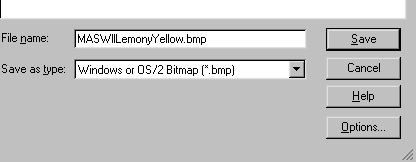 |
OK, Let me tell you now - pick yourself a prefix - you will create a bucket load of walls once you get the hang of it, and you will need to be able to identify them. I also like to identify the difference between walls, murals, and 2-story wallpapers, which is why it's called Walls, and finally give it a pretty name - like MASWllLemonyYellow. |
Hint: Save it in the Walls folder in the Maxis\The Sims\Game Data\Walls folder seeing as this is where HomeCrafter will put the wall files anyways. When you are making a lot of wallpapers it can get tedious alternating between the bitmap folder and the wall folder. Putting the bitmaps straight into here can cut through that tedium pretty quickly. Once you've made the wallpaper, you can take the bitmaps back out/delete them, do whatever you like with them.
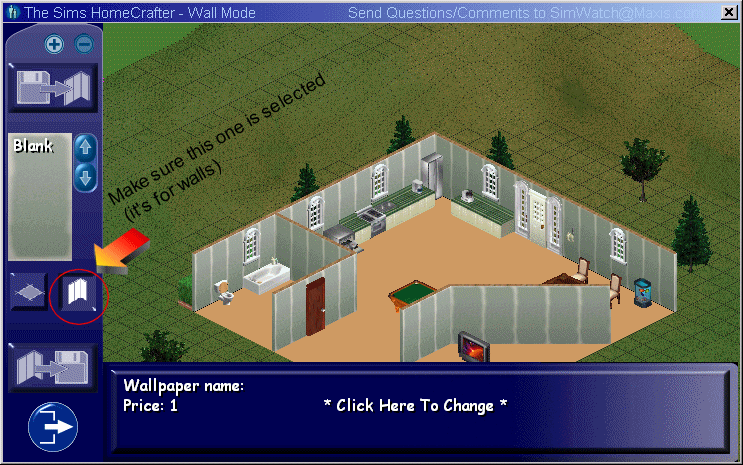
Before you open it up - make sure that your screen resolution is at 16bits (medium). Otherwise HomeCrafter complains .
 |
1. Select the Bitmap
Make sure the Wall selection is highlighted. Then press the button for getting the bitmaps. |
 |
It will bring up a file selection window
- select your bitmap, and press ok.
When you come back to this page - the wallpaper above that says blank now - will have your wallpaper in it. You can apply it to the house in the picture by clicking on the walls. Doing it with a Shift-Click, will do all the walls. When you're doing wallpapers with patterns this can be useful, for checking the tiling. But for us now - it's not really needed except to see how your wallpaper looks. Pretty, huh? |
 |
2. Change
the Description, name and price
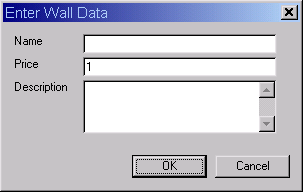
See where it says *Click Here to Change* ? Click there, and you'll get the Wall Data Window. This is where you get to name your wall (the name that gets displayed in the game), the price that you want to charge for it and a description. When you are doing descriptions - don't forget to
include your name, and an email address/URL where people can send their
praises to you! Click OK to finish the description. |
 |
3. Save the
Wallpaper
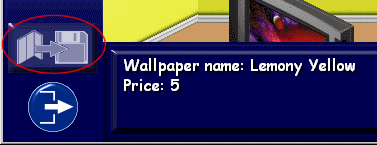
One more thing left to do - and that is press the button to save it. It will bring up the "Save As" window. This is where you name it as it will appear on your PC. If you notice, HomeCrafter automatically puts in your bitmap name there. So if you've named the bitmap well, you won't have to change anything. |