

- SimPE
- Color Enabler Package
- Paintshop Pro 7 or some other drawing tool that has layers, gradients and noise.
- SimPE - from The SimPE - The Sims2 Package Editor Site
- CEP - from the same site as SimPE.
- A Paintshop Pro demo version can be obtained from Jasc - but it's well worth buying if you can afford it.
SimPE is frequently updated. So any session of creating that you do, the first step should always be - go to the site and check for the most up-to-date version. This ensures that you will get the most stable program to work with, which includes everything that people have discovered so far.
The Version I wrote this tutorial with was v22 - available from 28 Feb 2005. Updated with V60 on 11 January 2007.
Step 1 Make the Sims 2 - Testing version of the game, the main version of the Game.
If you've done the Tutorial, "Creating a Game Space for Sims2" then you'll know what I'm talking about in Step 1. If you haven't done that tutorial - go do it now. We'll wait for you.
Rename your playing version of The Sims 2 to "The Sims 2 - Play"
Rename your testing version to The Sims 2.
(In the Example, I'll rename "The Sims 2 - Build" to The Sims 2)

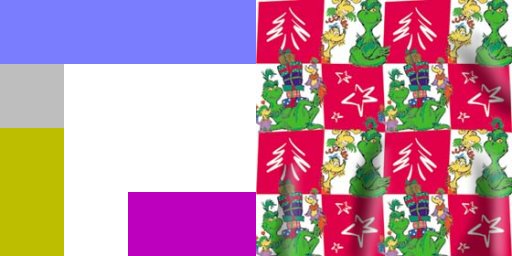
(If you've lost it or over-written it - then save the picture here - it's the same template).
- The Blue Bit is the pole
- The Green Bit is the Tapestry cloth
- The Yellow bit are the tags that hold the Tapestry to the pole
- The Pink bit is the end of the pole.
It needs to be fairly square because it will look strange if you resize it more than a few percentage points with a different height and width.
Also it's better to have a bigger picture and size it down to 256x256, rather than a smaller picture - because the quality of the picture deteriorates when it is expanded. That's where you get the blurry pictures from.
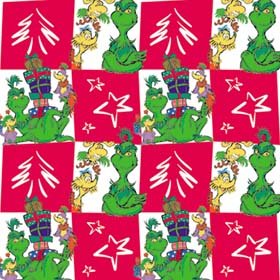
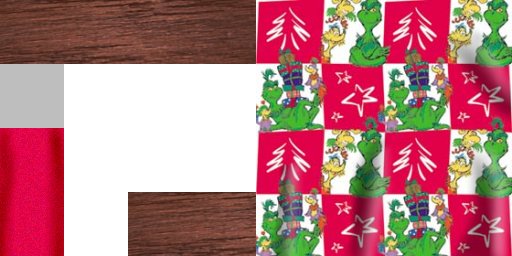
OK - So here's the picture that I'm going to use. It's an image from a wrapping paper site that I liked

If you look below - you can set the resize type. I generally have mine set to "Smart size".
Also if you have "Maintain Aspect ratio of " ticked, it will keep the picture in the right ratio.
If you need to make it more square than it is - untick that box.
Copy the picture and paste it as a layer onto the template and then move it over the green bit.
Then add this psp file as a layer onto it, and adjust the transparency of the layer until the folds look right. This gives you the shading you need to make the tapestry look foldy.
Then choose a color for the tags - I'm going to choose red. Select the tag, and fill it with the color. I've added noise, and shaded the areas to give it more interest.
For this tapestry, I'm going to put on a wood pole, and the same color tips.
To do that - select the layer with the template, mask the area that is the pole, and then fill it with a wood texture (I've just used the finished wood texture that came with PSP).
Save it as a PNG file in the same folder as your mesh. (That'll make it easy to find).
Give it a name that's close to the name of tapestry that you're going to create. That makes it easy to find too.
I'm calling mine MAS2TapGrinch
(MAS - identifies it as mine. 2Tap - is for 2 Tile Tapestry, and Grinch - well that's sort of obvious
Click on Object Workshop.
Then Choose 'Open...'
It will bring up a Folder Dialog Window, choose the object you want to make a recolour for.
Then wait.
SimPE will be loading up both the custom objects, and all the packages it needs from the game. This takes some time.
When you're naming the package, decide on a naming convention and stick to it.
If you remember - we called the picture MAS2TapGrinch.
Well - That's going to be the same as the package name.
Then Press Save.
Choose the top selection in the Filetypes.
Then in the Packed Files area, Choose "Texture Image"
Then choose the "Plugin View"
Choose "Import" to get the picture file.
Because we've name the picture file the same as the package - the picture is easy to find.
Press Open to add.
And we're brought back to the Main window again.
Now the next thing to do is update all sizes.
So bring up the right-click menu by right-clicking on the picture, and select "Update all Sizes".
This will update all the pictures of the different sizes. (If we don't do this, then only the closest version will have our picture and the further away we get, the more it will have the default picture.)
After that - we press "Commit" up in the
corner, and wait for the popup to appear.
Finally we go up to the File option in the menu bar, and select Save.
And we're done. That wasn't so hard, was it!
Now you can go test it in your game.
Remember - we've got the Test Space set up, so that means that the only user objects we'll have in the game are the ones we want to test.
Once you're happy it works in your Test game, swap your game back to your play version, and test it again, to make sure that it doesn't clash with any of your other objects.
And we use the SimWardrobe_3tile_tapestry_1.package to create the Recolor from.
Now off you go and
Recolor to your heart's content.
And don't forget to contact
me and let me know about your recolors.
I'll add you to the links on the New Mesh page!